In the VMware vSphere environment, the virtual machine snapshots feature serves as a pivotal tool for system administrators and IT professionals. VM snapshots offer a way to record the state of a virtual machine at any moment, providing a safeguard for troubleshooting, testing new configurations, and shielding against potential pitfalls.
Table of Contents
What Are Virtual Machine Snapshots?
Virtual machine snapshots are essentially a “point-in-time” capture of a VM’s settings, disk data, and system memory. They effectively allow you to bookmark a specific moment in the lifespan of your VM, much like a camera snapshot, so that you can return to that state whenever necessary.
These snapshots are invaluable for troubleshooting, testing software updates, backing out changes, and more. However, it is essential to note that snapshots are not full backups. They offer a speedy way to safeguard your VM’s state without duplicating the entire machine. Simultaneously, they can exhaust a lot of storage and impair performance if not governed well – hence judicious use is recommended.
Considerations When Using Snapshots
The benefits of snapshots include the ability to restore a virtual machine to its previous state, test software configurations without affecting the production environment, and protect the VM from data loss. But they are not without drawbacks, including performance degradation, snapshot management complexity, and they do not encapsulate changes to the VM post the snapshot.
Creating and Managing Snapshots
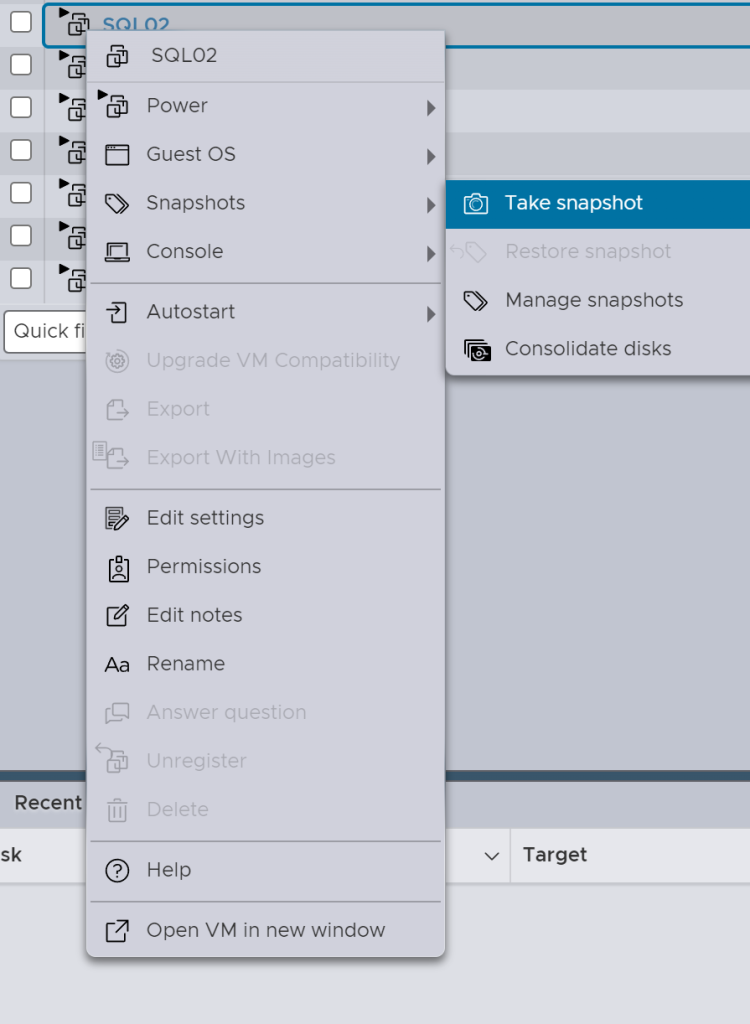
Creating a snapshot is a straightforward process. First, navigate to the virtual machine you want to create a snapshot of in the vSphere console. Next, right-click on the virtual machine and select “Snapshots” > “Create Snapshot.” Finally, choose the type of snapshot you want to create, either a standard snapshot or a snapshot with memory, and select “Finish.”
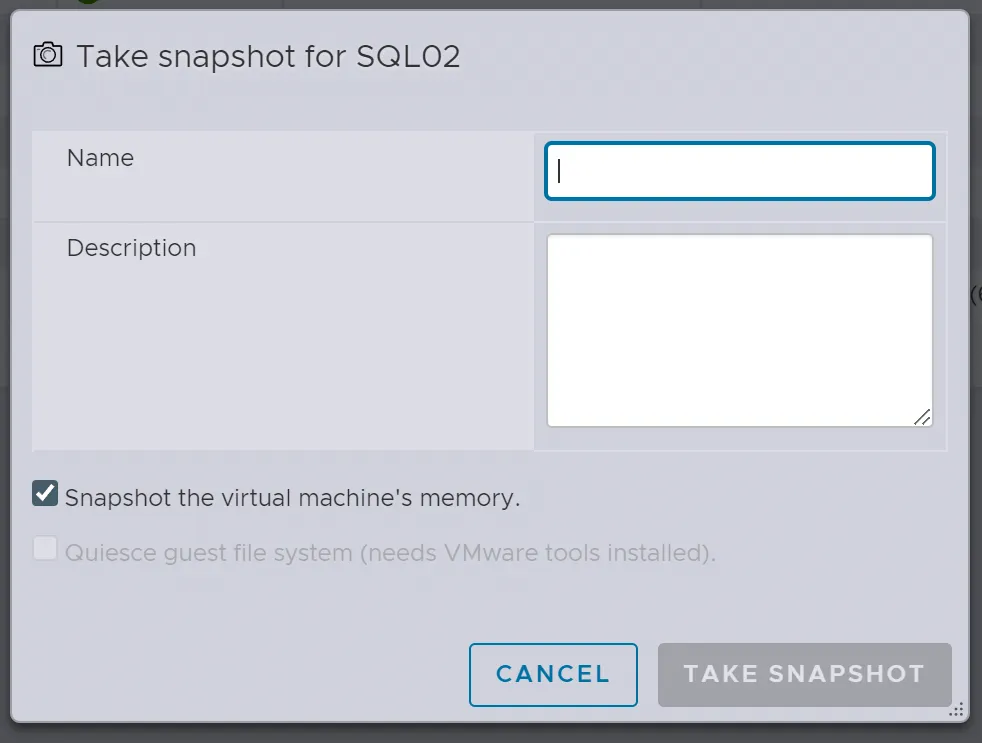
Ensuring “Snapshot the virtual machine’s memory” is checked allows the snapshot to capture the exact state of the VM’s memory at the point in time when the snapshot is taken. This includes the running processes and open applications, making it possible to resume the VM exactly as it was, without needing to restart the operating system or applications. If you don’t check this option, only the VM’s disk state is captured, and you may lose the running state of applications and processes.
To take a Snapshot of a VM using PowerCLI
# Connect to vCenter Server
Connect-VIServer -Server <vCenter_Server_Address> -User <Username> -Password <Password>

# Get the virtual machine object
$vm = Get-VM -Name "VM_NAME"

# Create a snapshot of the VM
$snapshot = New-Snapshot -VM $vm -Name "Snapshot_Name"

# Disconnect from vCenter Server
Disconnect-VIServer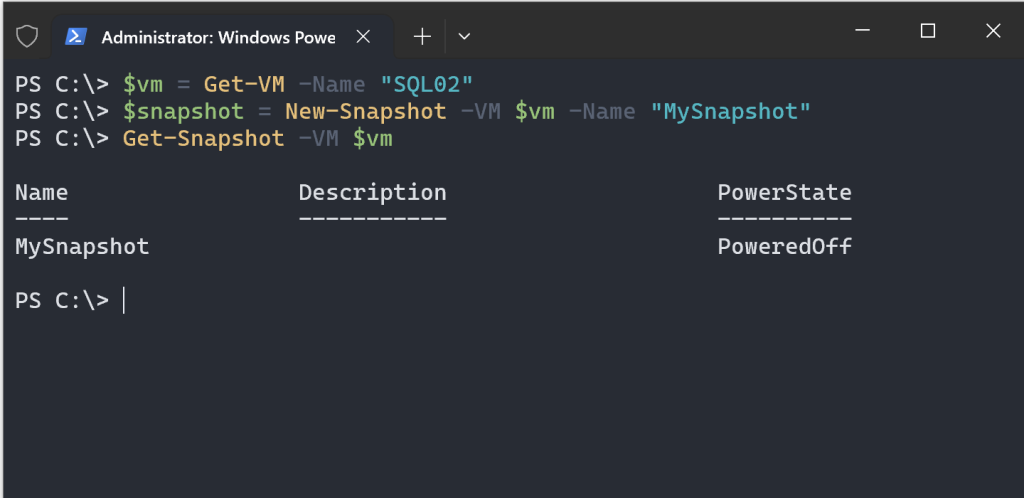
To remove a Snapshot of a VM using PowerCLI
$vm = Get-VM -Name "VM_NAME"
$snapshot = Get-Snapshot -VM $vm -Name "Snapshot_Name"
Remove-Snapshot -Snapshot $snapshot -Confirm:$false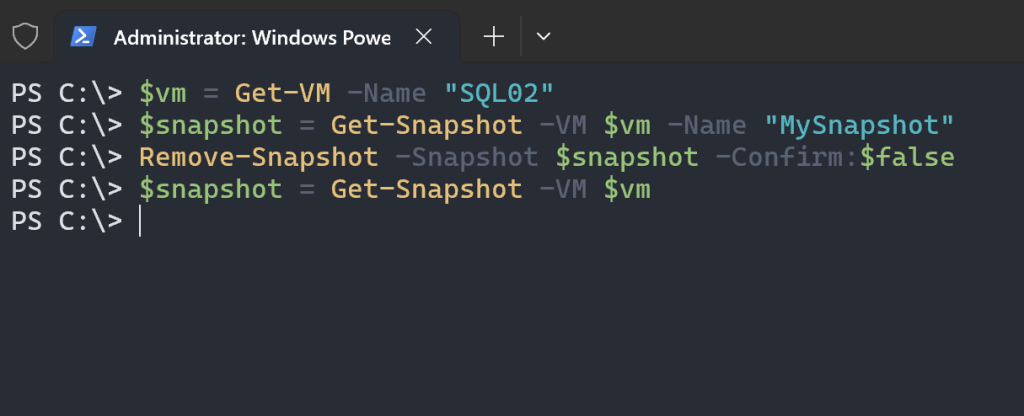
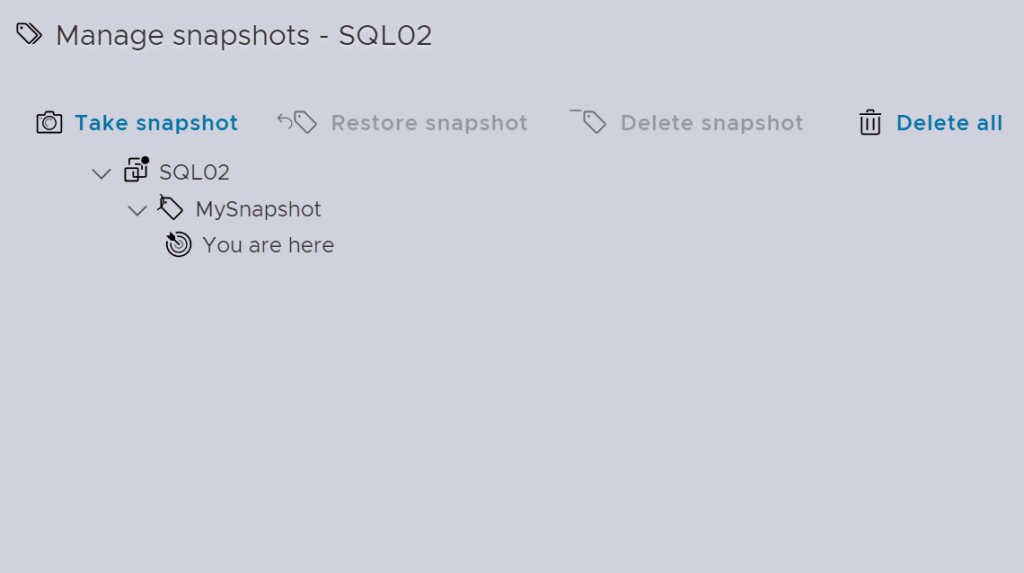
Managing snapshots is just as important as creating them. You can manage snapshots in the vSphere console by navigating to the virtual machine and selecting “Snapshots” from the menu. From there, you can create, delete, or revert to a snapshot.
Snapshot Files: Understanding the Components
Snapshots use a variety of file formats, each with specific roles and properties:
Delta Disk Files: Delta disk files (.vmdk) are writable files that track the changes to a VM’s disk since the last snapshot was taken, preserving the state of the virtual disk. These files consist of a descriptor file detailing the virtual disk and parent-child relationships, and a corresponding file containing the raw data.
Flat Files: Flat files form part of the base disk .vmdk file, which houses the raw data for the base disk. The flat file isn’t shown in the Datastore browser; it can be viewed by using the vSphere console in the Virtual Machine folder.
Database Files: The .vmsd file is the primary data source for the Snapshot Manager. It contains snapshot information and line entries that outline the relationship between each snapshot’s child disks and previous snapshots.
Memory Files: The .vmsn file captures the VM’s active state. These memory snapshots aids in restoring the VM to a state where it is turned on. In contrast to non-memory snapshots, memory snapshots require more time to create, depending on the VM’s assigned memory volume and the ESXi host’s writing speed.
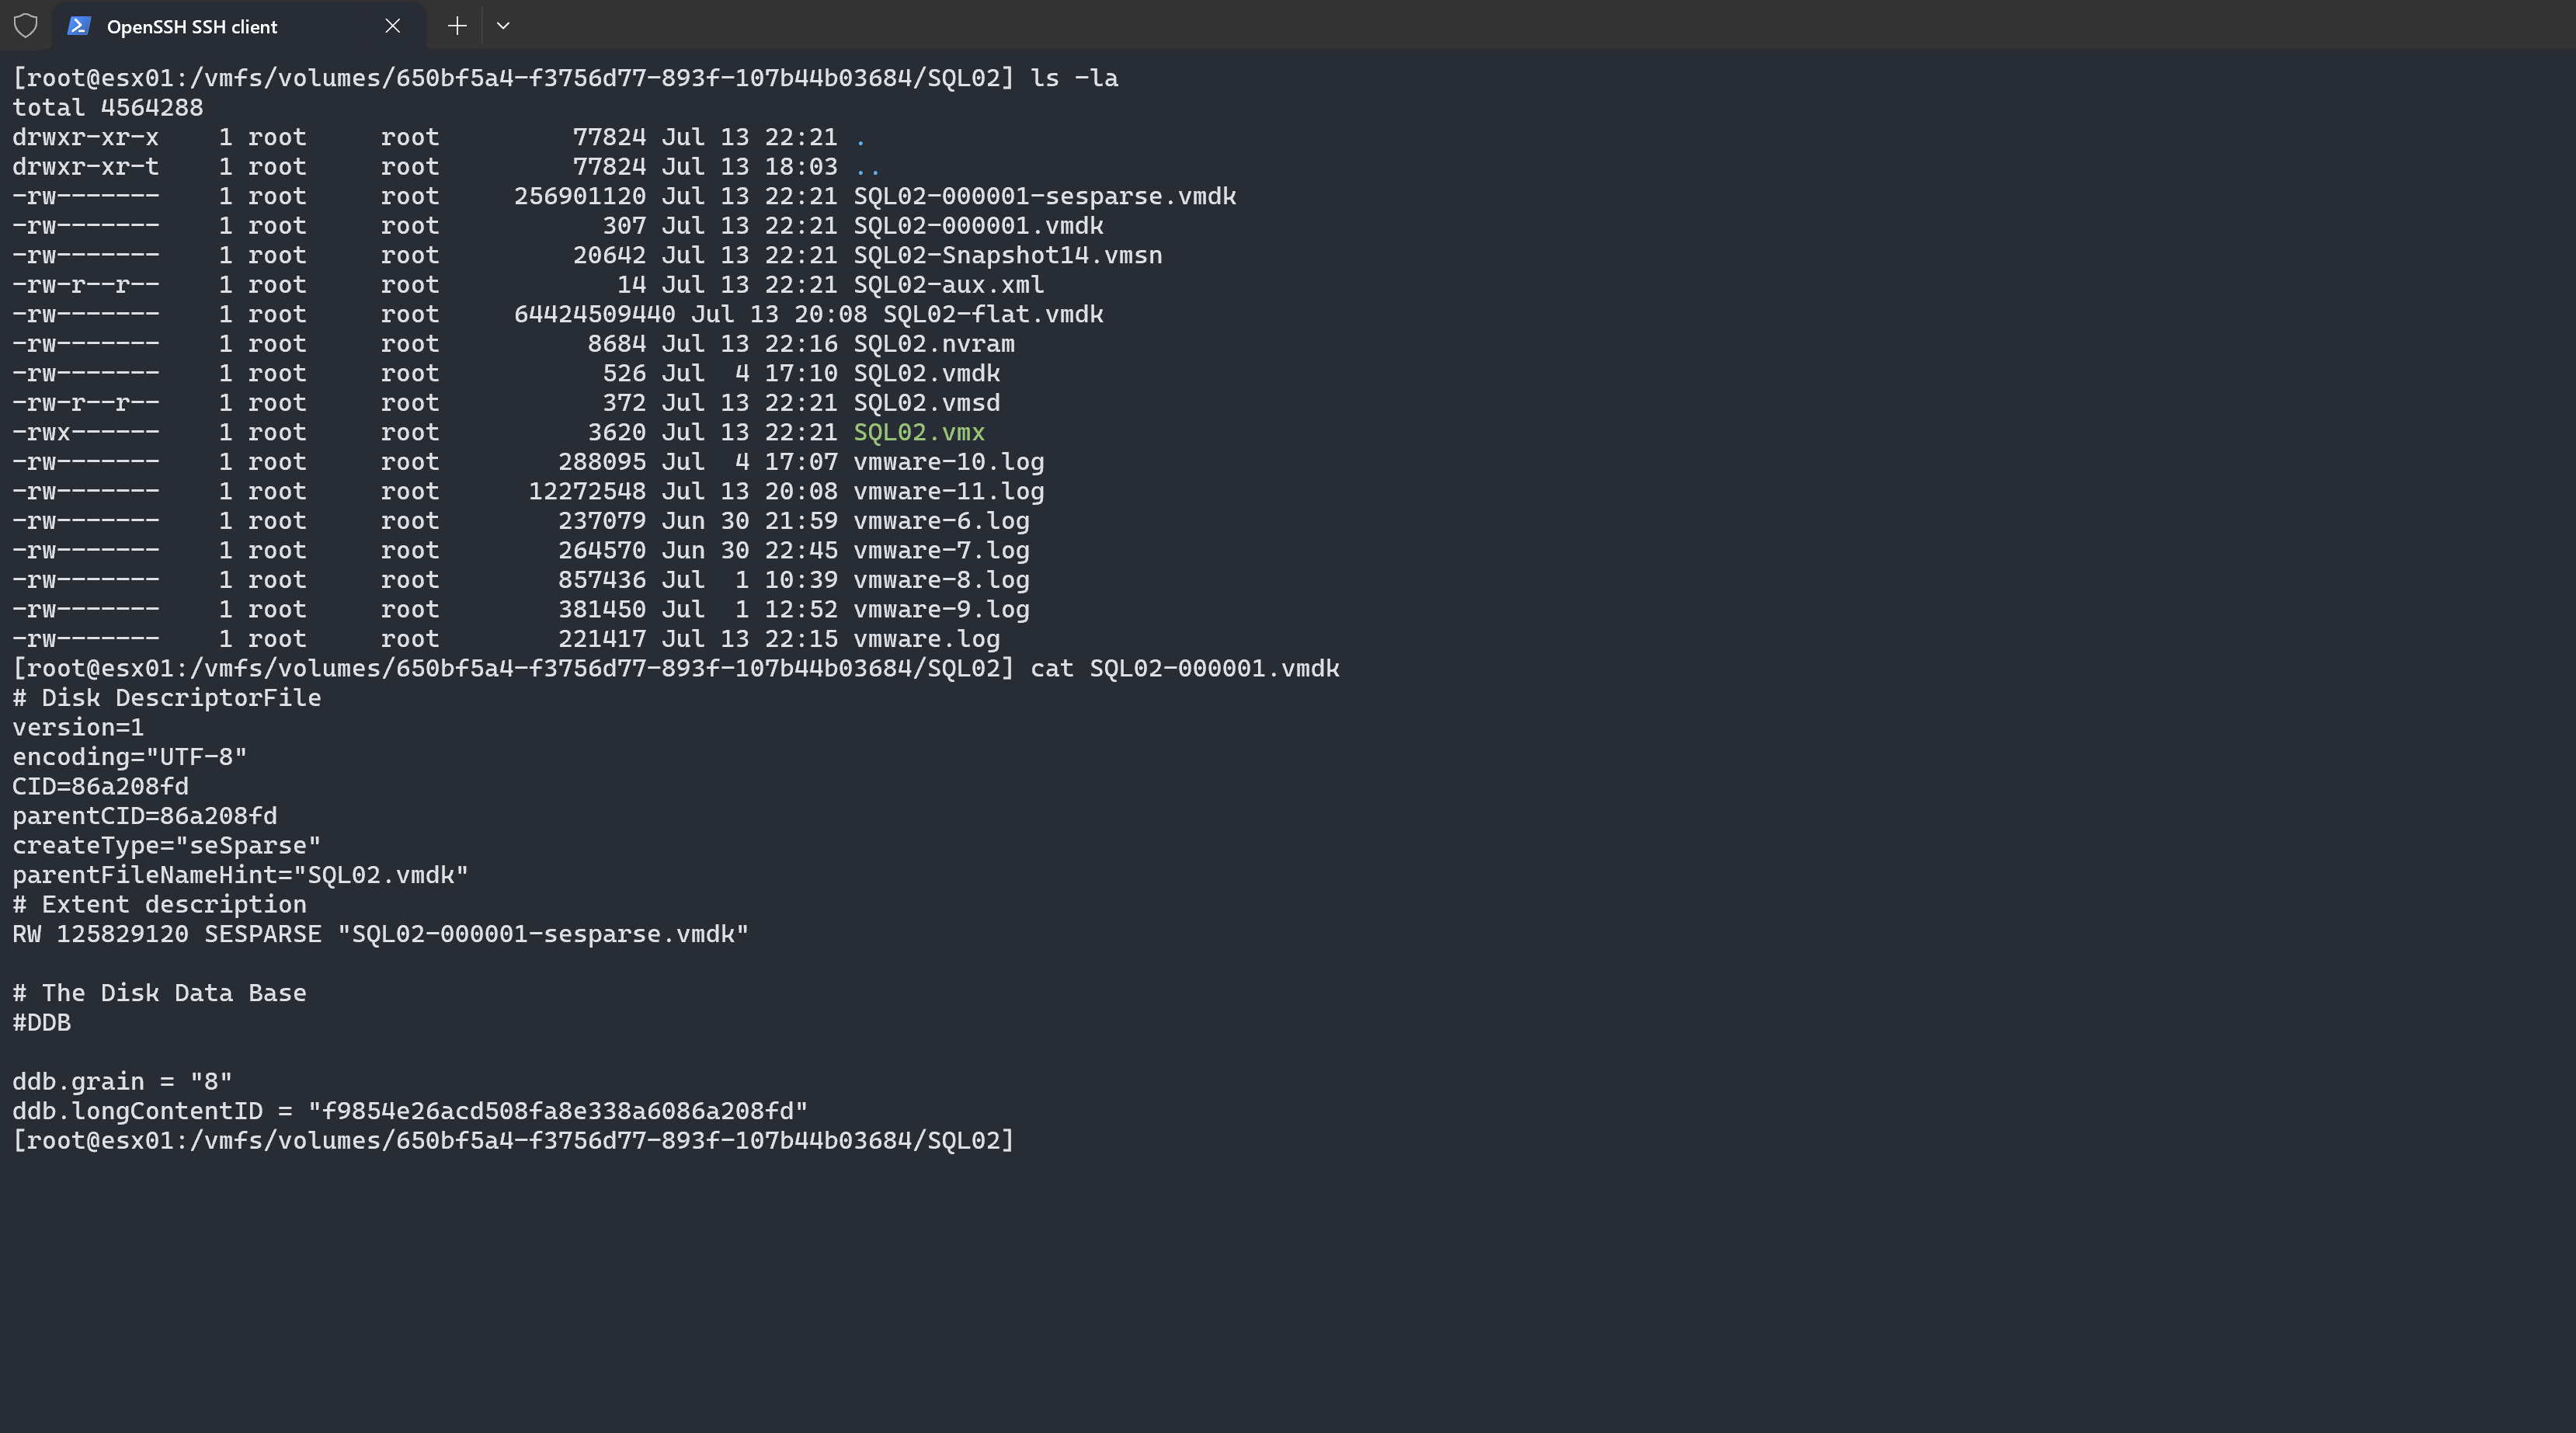
Here’s a breakdown of the information:
- version: Defines the version of the descriptor file format.
- encoding: Specifies the character encoding used in the file.
- CID: Unique identifier for the virtual disk.
- parentCID: If this is a differencing disk, it specifies the parent disk’s CID.
- createType: Indicates the type of disk format. In this case, “seSparse” refers to a thin provisioned disk that only allocates space as needed.
- parentFileNameHint: Suggests a filename for the parent disk.
- RW: Indicates the disk access mode as “read-write”.
- 125829120: Represents the size of the virtual disk in bytes.
- SESPARSE: Specifies the type of sparse format used for the disk.
- “SQL02-000001-sesparse.vmdk”: Points to the actual file containing the sparse data for the virtual disk.
A key note in snapshot management within VMware is understanding the specific behaviors and limitations relating to storage and file management. For instance, filenames are chosen based on availability and not always consistent across all child disks. Besides, if the virtual disk exceeds 2TB, the delta file defaults to the –sesparse.vmdk format. In VMFS6, all snapshots transform to sesparse regardless of the size.
Conclusion
Undeniably, VM snapshots provide a valuable technique to maintain system integrity, making problem-solving simpler without the risk of destabilizing the entire system. Nevertheless, understanding their benefits, drawbacks, and appropriate management is crucial for their efficient use.